
This document will give you a quick understanding of writing syntax highlighting parsers for Allaire's HomeSite 4.5. This tutorial is not meant to be exhaustive, it is just supposed to get you started. There are some concepts that I have not covered in this tutorial because I am saving them for future tutorials. These tutorials can be found at www.webelement.net.
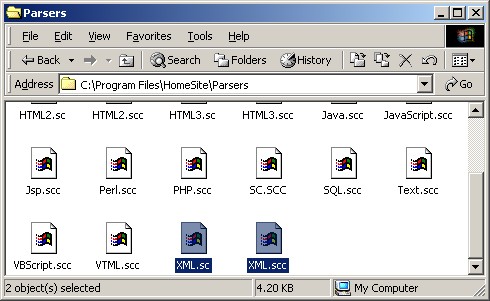
For this tutorial we will be using the following simple XML parser. It is a fully-functional parser that can be expanded to meet your own needs. To jump right in, you can cut-and-paste this following text into a file and follow the instructions at the end of this document to install the parser into HomeSite.
// Elements
#define DEFAULT 0
#define XML_TAG 1
#define XML_INSTRUCTION 2
#define XML_ENTITY 3
#define XML_COMMENT 4
#define CUSTOM_BURNS 5
// States
#define IN_DEFAULT 0
// Common Expressions
#define _ALPHA '[_A-Za-z0-9]'
#define _NOT_ALPHA '[^_A-Za-z0-9]'
#define _ALL_CHARS '[\x00-\xFF]'
#define _DONT_CARE _ALL_CHARS
#define DEFAULT_BACKGROUND clWhite
#define DEFAULT_FOREGROUND clBlack
%%language
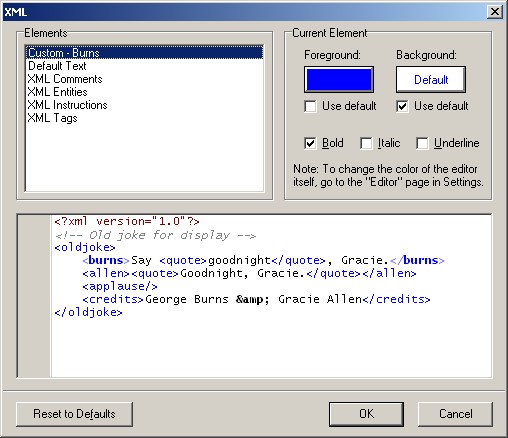
Name = 'XML'
Case = __SENSITIVE
StartState = [IN_DEFAULT]
EditableStyles = ('Default Text' , DEFAULT),
('XML Tags' , XML_TAG),
('XML Instructions' , XML_INSTRUCTION),
('XML Entities' , XML_ENTITY),
('XML Comments' , XML_COMMENT),
('Custom - Burns' , CUSTOM_BURNS)
ExampleText = '<?xml version="1.0"?>\n\
\<!-- Old joke for display -->\n\
\<oldjoke>\n\
\ <burns>Say <quote>goodnight</quote>, Gracie.</burns>\n\
\ <allen><quote>Goodnight, Gracie.</quote></allen>\n\
\ <applause/>\n\
\ <credits>George Burns & Gracie Allen</credits>\n\
\</oldjoke>'
%%words
'<' '[A-Za-z/]' XML_TAG [IN_DEFAULT]
'<?' _DONT_CARE XML_INSTRUCTION [IN_DEFAULT]
'<!--' _DONT_CARE XML_COMMENT [IN_DEFAULT]
'<burns>' _DONT_CARE CUSTOM_BURNS [IN_DEFAULT]
'</burns>' _DONT_CARE CUSTOM_BURNS [IN_DEFAULT]
%%handlers
XML_TAG _DONT_CARE? '>' _use_
XML_INSTRUCTION _DONT_CARE? '>' _use_
XML_COMMENT _DONT_CARE? '\-\->' _use_
%%tokens
XML_ENTITY '&' '[A-Za-z0-9#]'? ';' _use_
%%effects
DEFAULT [] DEFAULT_FOREGROUND* DEFAULT_BACKGROUND*
XML_TAG [] clBlue DEFAULT_BACKGROUND*
XML_INSTRUCTION [] clMaroon DEFAULT_BACKGROUND*
XML_ENTITY [fsBold] DEFAULT_FOREGROUND* DEFAULT_BACKGROUND*
XML_COMMENT [fsItalic] clGray DEFAULT_BACKGROUND*
CUSTOM_BURNS [fsBold] clBlue DEFAULT_BACKGROUND*
%%map
DEFAULT DEFAULT
XML_TAG XML_TAG
XML_INSTRUCTION XML_INSTRUCTION
XML_ENTITY XML_ENTITY
XML_COMMENT XML_COMMENT
CUSTOM_BURNS CUSTOM_BURNS
I would highly recommend downloading the TSyntaxMemo help document to assist you in writing parsers if want to move at your own pace. There are tons of examples and many more details than I've provided here. Visit the following link for documentation:
http://www.wilk4.com/asp4hs/tsmdocs.htm
I'll now go through each section of the parser above and explain how they all work. Please feel free to e-mail me any questions you might have about them.
Element definitions are used to assign unique IDs to elements your parser will recoginize. These IDs are used internally by the parser engine while your document is being parsed. Each element and state you want to work with must be defined. Elements and states can be defined within a range of 0 to 255. Each element and state must also have a unique number associated with it. The 0 element is a special element, it is the default element for the parser. Always use 0 as the default element. Doing otherwise will just make for unnecessary headaches.
The Common Expressions section below shows how you can define macros for use throughout your parser. Before your parser is compiled, all instances of macros in your parser will be replaced with the expression you've typed. The ones in our example are always useful and will probably be in every parser you create. I would encourage making up new ones if you use an expression more than once. It will save you a lot of time in the long run.
Here are the element definitions from our XML parser:
// Elements
#define DEFAULT             0
#define XML_TAG             1
#define XML_INSTRUCTION     2
#define XML_ENTITY          3
#define XML_COMMENT         4
#define CUSTOM_BURNS        5

// States
#define IN_DEFAULT          0

// Common Expressions
#define _ALPHA              '[_A-Za-z0-9]'
#define _NOT_ALPHA          '[^_A-Za-z0-9]'
#define _ALL_CHARS          '[\x00-\xFF]'
#define _DONT_CARE          _ALL_CHARS

#define DEFAULT_BACKGROUND  clWhite
#define DEFAULT_FOREGROUND  clBlack
The %%language section of a parser defines the parser parameters and allow you to specify HomeSite's interface to the parser. As your parser becomes more advanced and complicated, the %%language sections provides the key to better performance. (These performance issues will be discussed in a later tutorial when these performance issues will begin to arise)
Here is the %%language section from our XML parser:
%%language
Name            =   'XML'
Case            =   __SENSITIVE
StartState      =   [IN_DEFAULT]
EditableStyles  =   ('Default Text'         , DEFAULT),
                    ('XML Tags'             , XML_TAG),
                    ('XML Instructions'     , XML_INSTRUCTION),
                    ('XML Entities'         , XML_ENTITY),
                    ('XML Comments'         , XML_COMMENT),
                    ('Custom - Burns'       , CUSTOM_BURNS)
ExampleText     =   '<?xml version="1.0"?>\n\
                    \<!-- Old joke for display -->\n\
                    \<oldjoke>\n\
                    \	<burns>Say <quote>goodnight</quote>, Gracie.</burns>\n\
                    \	<allen><quote>Goodnight, Gracie.</quote></allen>\n\
                    \	<applause/>\n\
                    \	<credits>George Burns & Gracie Allen</credits>\n\
                    \</oldjoke>'
We'll now take a look at the entries in the %%language section:
Note the use of slashes and the \n in the example at the beginning of this section. These allow you to add new lines and indentation for your example code. You should use spaces for your indentation instead of tabs so the indentation matches when displayed in the Edit Scheme dialog.
Also, some characters will need to be escaped (have a \ put in front of them) in order for them to display properly. Most notably the single quote since it is used to begin and end the ExampleText string.
The %%words section allows you define strings that will be recognized as elements defined in your parser. In most cases elements defined in the %%words section are the beginning of a sequence of characters that make up a single larger element. If these cases %%words works hand-in-hand with the %%handlers section. The %%handlers section will be explained in a bit.
Here is the %%words section from our XML parser:
%%words
'<'              '[A-Za-z/]'         XML_TAG          [IN_DEFAULT]
'<?'             _DONT_CARE          XML_INSTRUCTION  [IN_DEFAULT]
'<!--'           _DONT_CARE          XML_COMMENT      [IN_DEFAULT]
'<burns>'        _DONT_CARE          CUSTOM_BURNS     [IN_DEFAULT]
'</burns>'       _DONT_CARE          CUSTOM_BURNS     [IN_DEFAULT]
As you can see, there are four columns for each %%words entry. The columns are defined as follows:
Important Note:
All entries in the %%words section must be unique. This means that each entry must have a different string to recognize or a different state requirements.
The %%handlers section works with the %%words section to complete elements who have a specific beginning and end, but the middle is less strict. The best example of this is the XML_TAG entry in the %%words section. An XML_TAG begins with a < and ends with a >. Just about anything can be in between the tags. When an entry in the %%words is recognized, the parser looks for a matching entry in the %%handlers to complete recognition of the element.
Here is the %%handlers section from our XML parser:
%%handlers
XML_TAG             _DONT_CARE?           '>'          _use_
XML_INSTRUCTION     _DONT_CARE?           '>'          _use_
XML_COMMENT         _DONT_CARE?           '\-\->'      _use_
The four columns of a %%handlers entry are defined as:
If you have very simple elements with specific requirements that need to be identified, then you should use the %%tokens section. In our XML example, we specified XML_ENTITY as a token. They always start with &, can only contain a #, A-Z, 0-9 and always end with a semi-colon.
Here is the %%tokens section from our XML parser:
%%tokens
XML_ENTITY       '&'         '[A-Za-z0-9#]'?        ';'     _use_
The five columns of a %%tokens entry are defined as:
You should use %%words when:
You have a very literal element you want recognized, like a word or a simple tag that needs no flexibility.
You should use %%handlers when:
You know the beginning of an element (defined in %%words) and the end of the element, but the middle needs to be very flexible.
You should use %%tokens when:
You have a very simple element with a single beginning character, a single ending character, and a small set of characters that can be in the middle.
The %%effects section lets you define the default colors and styles for various elements.
Here is the %%effects section from our XML parser:
%%effects
DEFAULT           []             DEFAULT_FOREGROUND*     DEFAULT_BACKGROUND*
XML_TAG           []             clBlue                  DEFAULT_BACKGROUND*
XML_INSTRUCTION   []             clMaroon                DEFAULT_BACKGROUND*
XML_ENTITY        [fsBold]       DEFAULT_FOREGROUND*     DEFAULT_BACKGROUND*
XML_COMMENT       [fsItalic]     clGray                  DEFAULT_BACKGROUND*
CUSTOM_BURNS      [fsBold]       clBlue                  DEFAULT_BACKGROUND*
The four columns of a %%effects entry are defined as:
The %%map section allows you to map the effects of one element to another. This allows you to have only one entry in the effects table, but have multiple elements use the same effects. For example, lets say you declared < as the XML_START element and > as XML_STOP element. Well, we want both of these colored the same so rather than having separate effects we would map XML_START to XML_START and XML_STOP to XML_START. That way, we only need XML_START listed in the %%effects section. When we change the effects for XML_START, XML_STOP's effects will change as well.
Here is the %%map section from our XML parser:
%%map
DEFAULT              DEFAULT
XML_TAG              XML_TAG
XML_INSTRUCTION      XML_INSTRUCTION
XML_ENTITY           XML_ENTITY
XML_COMMENT          XML_COMMENT
CUSTOM_BURNS         CUSTOM_BURNS
The two columns of a %%map entry are defined as:
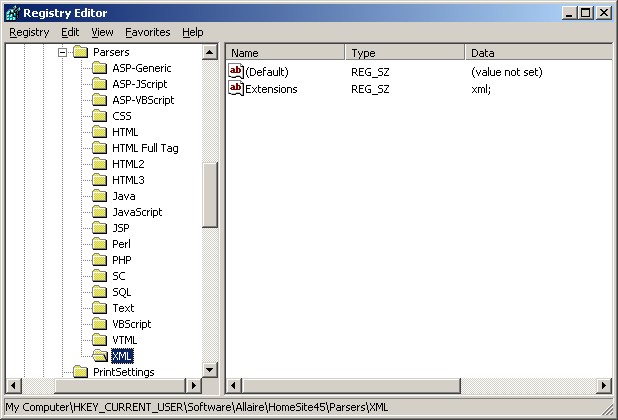
These instructions ask you to modify the Windows registry.
Like I said, this is a very abbreviated guide to creating your own parsers. Future tutorials will cover topics such as:
These tutorials will be available on my web site at http://www.webelement.net
Once again, e-mail me if you have any questions or comments.
B. Collier Jones
bcjones AT webelement.net
Back to the Parsers Tutorial Home
last updated: Friday, January 05, 2001 11:54:06 AM
Note: This tutorial copy is posted on wilk4.com with permission of the author, B.Collier Jones.
See http://www.wilk4.com/asp4hs/tsmdocs.htm for more information.
A downloadable Zip of this tutorial is also available.